
Kriegsmarine Vs Royal Navy
Our first battle report! a learning experience
In this game of Victory at Seas, I commanded the Kriegsmarine whilst my father commanded the Royal Navy. We decided on a What If scenario along the lines of the Battle of the Denmark Strait.
Models are all 1/1800 scale in various states of completion. Joys of working by myself on the design and painting of the ships, I ran out of time assembling the fleets used in this battle report

Kriegsmarine Flotilla
The Kriegsmarine Flotilla from back to front:
Lutzow
Bismarck
Prinz Eugen
Scharnhorst
Royal Navy Fleet
Outnumbering the German Flotilla the Royal Navy consisted of:
HMS Hood
HMS King George V
Cruiser: HMS Arethusa, HMS Exeter, HMS Leander
Destroyers: HMS Nubia, HMS Sikh and HMS Zulu

Deployment
Mimicking the deployment of the Battle of the Denmark Strait the two fleets deployed parallel with each other at a distance, with the Kriegsmarine ahead of the Royal Navy.
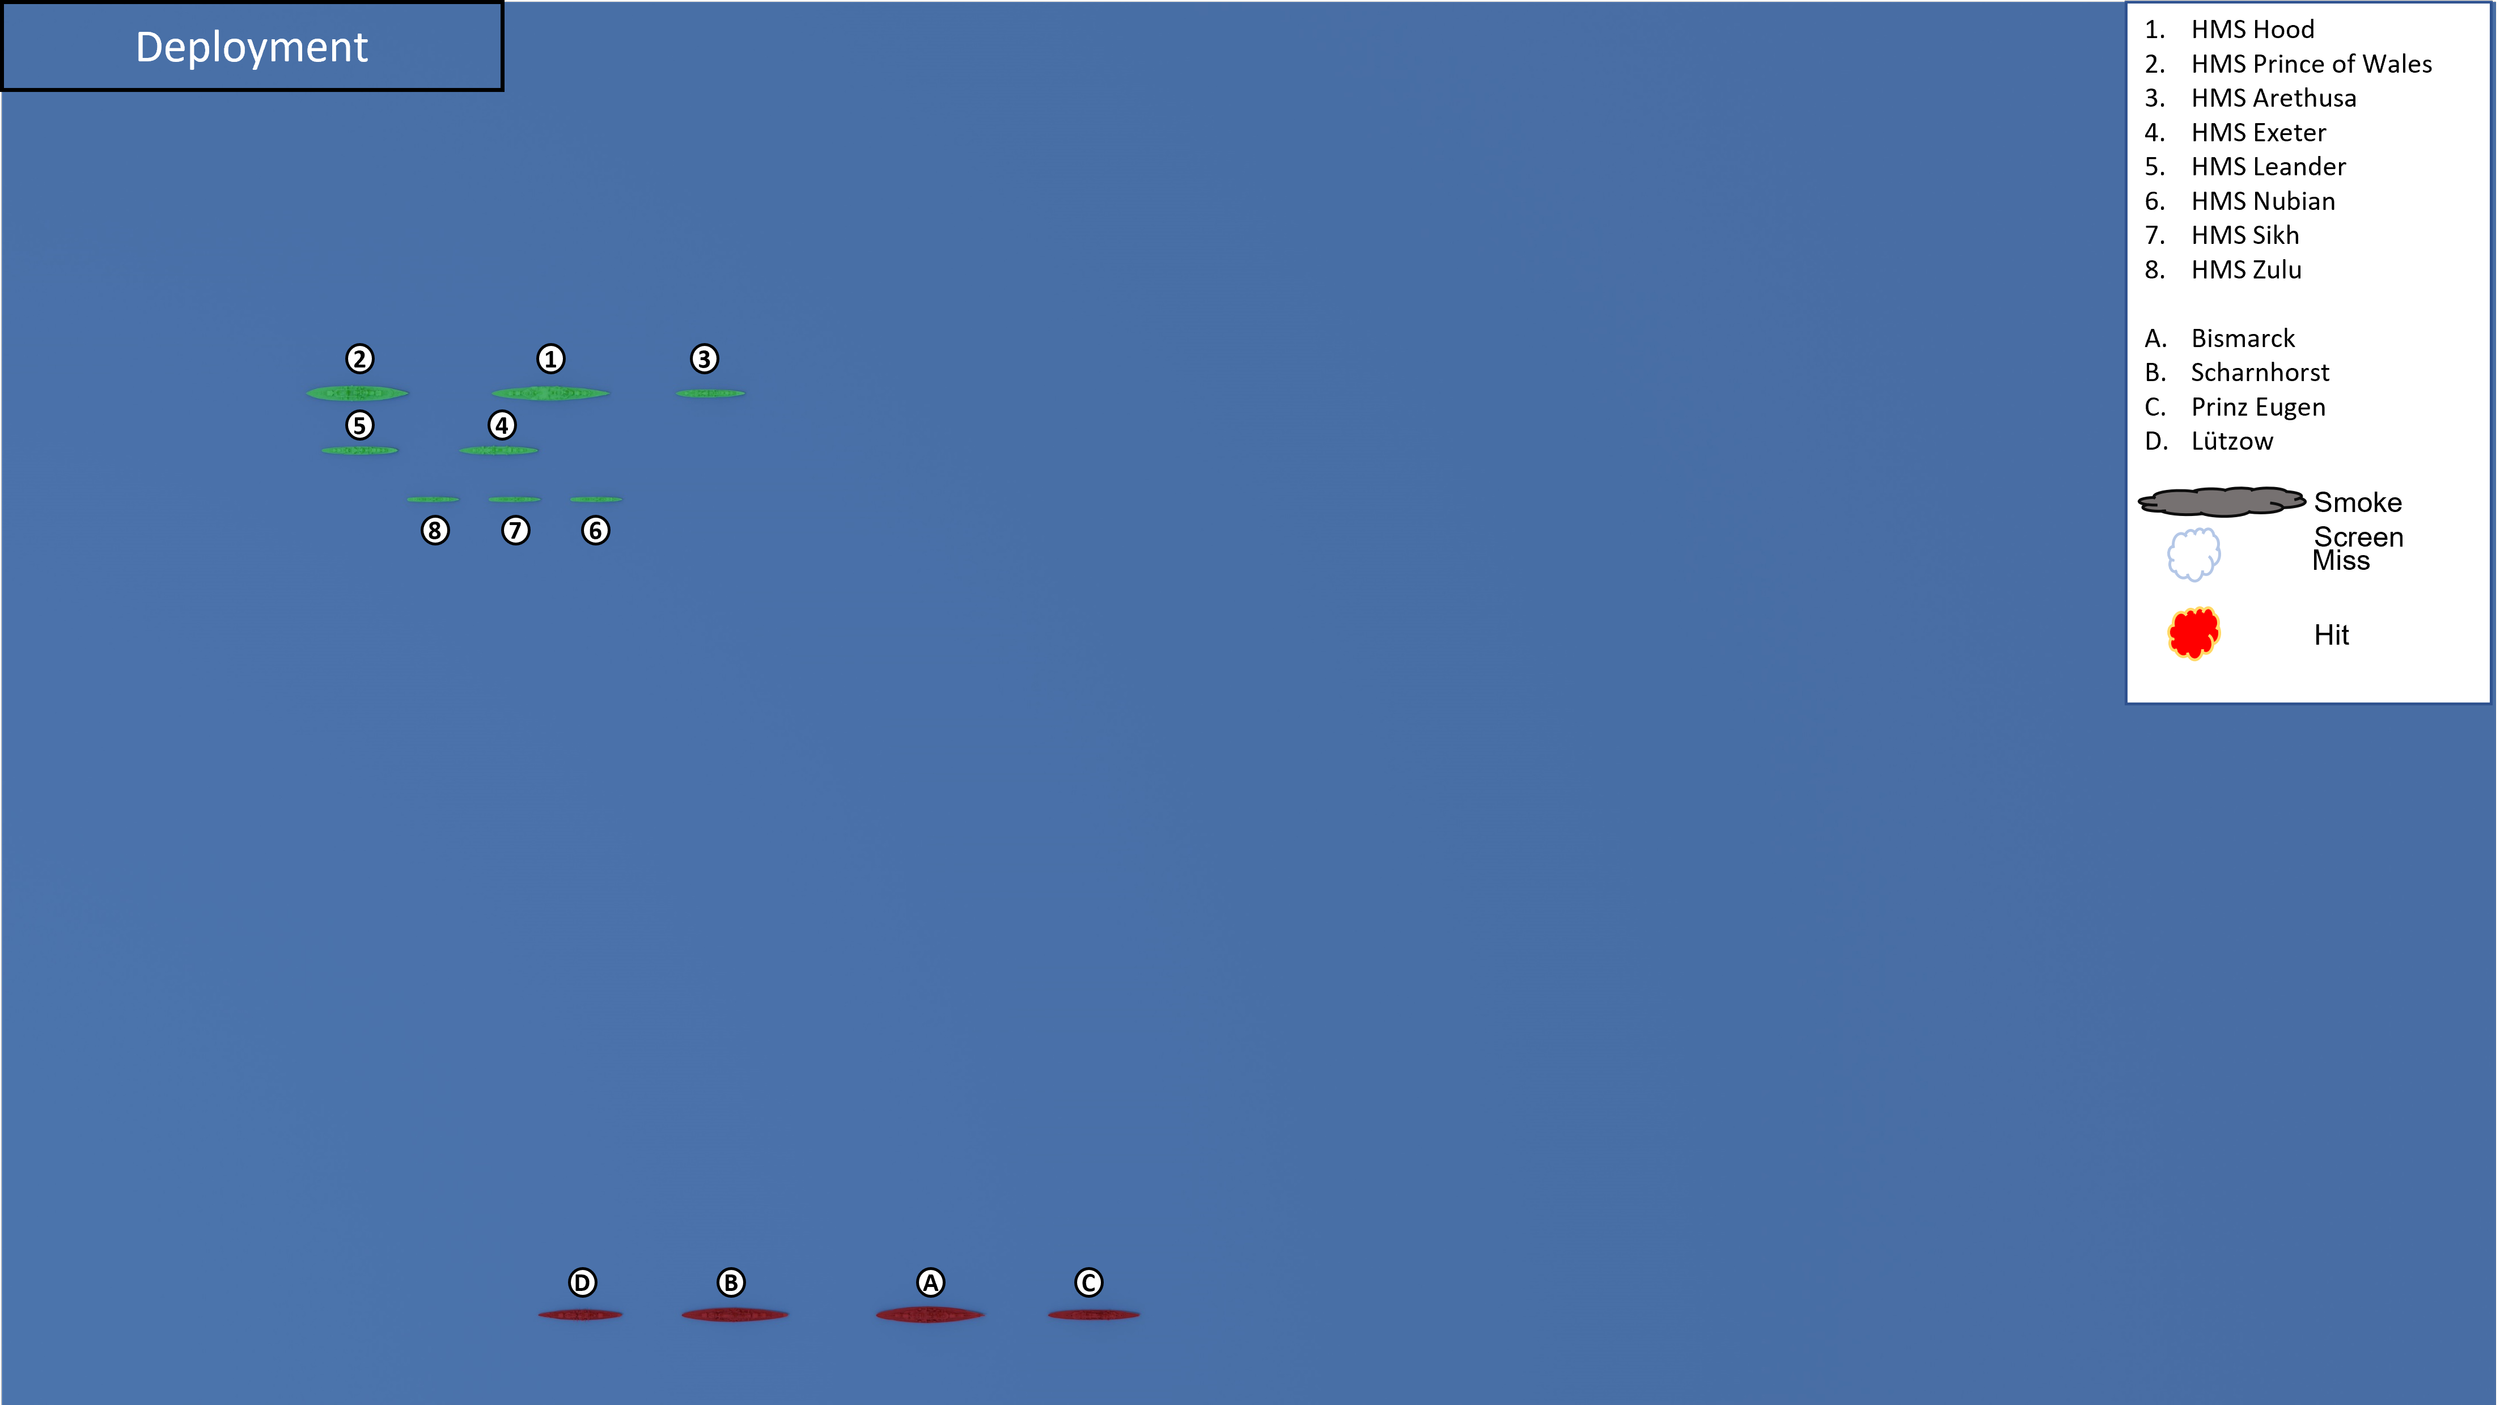

The Kriegsmarine deployment… with Scharnhorst bucking in the “waves”…
Royal Navy Deployment, and yes I hadn’t finished KGV’s secondary weapons…
Turn One
The first turn saw the British destroyers turning towards the Kriegsmarine and beginning to close the distance. Lützow Began her turn towards the enemy as well with the remainder of the Kriegsmarine line moving ahead whilst beginning a gentler turn towards the enemy.
There was very little gunfire in turn one, only Lützow and HMS Exeter were in range and exchanged fire with each other with the British failing to hit and the Exeter taking some light damage.

Turn Two
During the movement phase the British Destroyers laid down a smoke screen to try and shield the fleet, in particular HMS Exeter, from the Kriegsmarine. Lützow continued to close the distance whilst the main Kriegsmarine line continued the turn to bring all of their guns to bear whilst closing the range a little. The British cruisers also started to turn to close the distance and bring their guns into action.
Lützow started the gunnery of turn two, hitting Exeter and destroying her bridge! Exeter’s return fire saw the Lützow sustain damage to her secondary guns. Now it was the turn of the mighty Bismarck, firing her guns in anger for the first time, she devastated the poor HMS Arethusa which quickly slipped beneath the waves!
HMS Sikh fires at the closing Lützow and manages to score some hits. HMS Hood opens fire on the Prinz Eugen, scoring a lucky hit that jams the Heavy Cruisers rudder, forcing her to continue in a straight line for the remainder of the battle.
Prinz Eugen responds by targeting the damaged HMS Exeter scoring several hits. HMS Leander fires on the besieged Lützow scoring more hits. Scharnhorst opens fire on HMS Nubian, crippling the destroyer who remarkably stays afloat in the face of the barrage!
The final action of turn two is HMS Prince of Wales contributing to the slow disintegration of the Lützow, severely damaging the brave vessel.


Turn Three
Prinz Eugen slows down to keep the British main guns as far as possible whilst Bismarck manoeuvres behind her, almost using the Heavy Cruiser as a shield! Scharnhorst continues in behind the lead two vessels of the Kriegsmarine line. Lützow continues her slow advance into the teeth of the British fleet.
The Tribals continue to close, but fail to deploy another smoke screen, HMS Nubian slows down as the damage takes its toll on the plucky wee destroyer. Leander and Exeter alter course parallel to that of the British Battleships which continue on their course.
HMS Sikh starts the light show this time, crippling the larger Lützow! Bismarck continues to fire upon Hood, causing massive damage to the weapons, crew, and engines. Hood returns fire damaging the Bismarck’s engines. Scharnhorst joins the Flagship and cause minor damage to the Hood.
HMS Zulu tries to put Lützow down but fails to hit the smouldering cruiser. Prinz Eugen targets the beleaguered HMS Exeter who succumbs to the damage and sinks. Leander joins the assault on the Lützow and causes yet more damage, but Lützow refuses to go down and her return fire inflicts serious damage to the Leander whilst her secondary armament damage HMS Sikh.
HMS Prince of Wales fails to hit the Prinz Eugen


Turn Four
HMS Hood starts to turn away from the Kriegsmarine line with HMS Prince of Wales following behind. The Tribals close in on the hapless Lützow whilst the Leander moves perpendicular to the British Battleships. Prinz Eugen accelerates towards the two looming Battleships in attempt to divert fire away from the Kriegsmarine’s battleships.
Bismarck opens the turns fire with some devastating damage to HMS Hood, setting the British Battleship ablaze and damaging one of her main turrets. Hood returns fire and in spite of the damage to her turrets destroys the Bismarck’s bridge!
Scharnhorst comes to the flagships aid, sending more shells into the valiant Hood, causing damage to her engines with her main guns whilst her secondaries manage to hit HMS Zulu and damage her torpedo launchers.
HMS Leander continues to fire at Lützow but fails to cause much damage, in return the damaged German cruiser sends Leander to the bottom and attempts a desperate torpedo action against the circling British destroyers but fails to hit anything.
HMS Sikh launchers her own torpedoes and finally sinks the Lützow.
Prinz Eugen fires upon Hood but causes only minor damage, to the fire ravaged Battleship. Finally HMS Prince of Wales fires at Scharnhorst causing minor damage.


Turn Four
The final turn of the game saw the two relatively intact Tribals (HMS Sikh and HMS Zulu) close on the rear of the German battleships whilst Prinz Eugen continues to slowly close with the British battleships as Hood attempts to put more distance between her and the Kriegsmarine.
Once again it is the Bismarck who starts the shooting of the turn, destroying Hoods A turret. Bismarck’s secondary weapons prove unable to hit the nimble destroyers closing on her.
HMS Hood returns fire but causes only minor damage to the Bismarck, whilst her secondary batteries fail to damage the Prinz Eugen.
Scharnhorst fires at Hood and causes more massive damage as chain reactions ripple through the heavily damaged British battleship, another main turret is destroyer whilst her engines take heavy damage.
HMS Prince of Wales fires upon Bismarck, explosions send shrapnel through the crew of the German Flagship. Prince of Wales’s secondary weapons fail to damage Prinz Eugen as the German Cruiser continues its run of good luck.
Prinz Eugen joins in the destruction of the Hood, causing further damage to the doomed vessel. Finally Sikh and Zulu attempt to damage the German battleships but fail to do anything.

Conclusion
At the end of Turn Five the Royal Navy conceded the battle and the game is over. We both decided that HMS Hood would not have survived a sixth turn and with Bismarck and Scharnhorst a little bloodied but still at near full fighting efficiency the Royal Navy couldn’t realistically pull a victory from the jaws of this defeat.
Royal Navy Losses
Sunk:
HMS Leander
HMS Exeter
HMS Arethusa
Crippled:
HMS Nubian
HMS Hood
German Losses
Lützow – Sunk
